The extraordinary handsome Zamiokulkas in indoor floriculture appeared relatively recently - in the late 90s. Perhaps the flower growers were distrustful of the appearance of an exquisite handsome man in the flower market, having suspected a very capricious plant in it. But as it turned out, Zamioculcas is so unpretentious that even a novice can take care of it. But there is one caveat, namely a plant transplant, which you must be familiar with.
Home Features
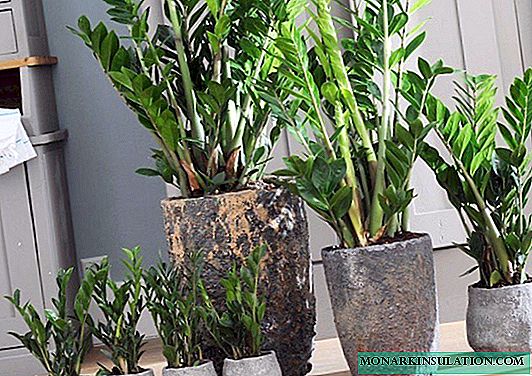
With all its presentability and luxurious appearance, zamioculcas, or dollar tree, is very easy to care for. No wonder it is called a plant for lazy housewives.

Zamioculcas is very popular in indoor floriculture
Humidity
Having perfectly adapted to the conditions of our apartments, Zamiokulkas easily tolerates even the heating season. And if a handsome man is completely indifferent to spraying, then wiping the leaves with a wet towel or infrequent bathing in the shower will be greatly appreciated. Such procedures will free from accumulated dust and help the plant to express itself in all its glory.
Lighting
The plant is also not particularly demanding for lighting, it feels great in bright (but from the direct sun, you still need to slightly shade) and diffused light. Summer willingly grows in the fresh air. But in winter it is better to put zamioculcas closer to the window, so that in the short light period the plant does not lose its saturated color of the leaves.

Zamiokulkas likes to spend summer outdoors
Temperature
A native of the hot African continent loves warmth. Therefore, when the thermometer creeps to a mark of + 30 ° C, zamioculcas feels quite normal. But still, the comfortable temperature in summer should be + 20 ... + 25 ° С. In winter, it is preferable to keep the plant in cooler conditions, at + 16 ... + 20 ° C. The critical temperature in winter is not lower than + 12 ° С.
Watering
Zamioculcas should be watered carefully, because due to the ability to accumulate water in the roots, the plant often suffers from overmoistening of the soil. In the summer, before the next watering, you need to wait until the soil in the pot is half dry. In winter, when kept in a cool room, watering is reduced to a minimum, producing the next wetting almost after the substrate has completely dried, which can be determined by the color of the soil - dried soil with a lighter shade.
Top dressing
During the growing season, from March to September, Zamioculcas is fertilized once every 2 weeks. Nutrition must be carefully selected. Compounds containing nitrogen can harm the root system, as well as a high concentration of the solution. For zamioculcas, it is better to use fertilizers for succulents and cacti, diluting the dose in more water than indicated.
Top dressing is applied only to moistened soil.

Zamioculcas should be fed carefully, in reduced doses.
Rules for boarding and transplanting
A transplant for any plant is a very crucial moment. Choosing the right substrate and capacity is half the battle. You still need to skillfully cope with the process itself. However, do not be alarmed, there is nothing difficult to transplant if you act on time and in accordance with all the rules.
We select the soil and the pot
When choosing soil for planting or transplanting Zamioculcas, one should take into account its ability to accumulate water by roots and the natural conditions of growth. Therefore, the soil for the plant must meet the following requirements:
- Be very loose, so that after irrigation water freely seeps through the ground, and not overloaded with nutrients.
- Have good breathability so that the roots do not lack oxygen.
- Possess neutral acidity.
When purchasing soil in the store, you need to choose the soil intended for succulents. But even in them it is desirable to add brick crumb, vermiculite or drainage of the smallest fraction as a baking powder. Nevertheless, take the time and effort to prepare a suitable substrate yourself. Moreover, it is not necessary to go to Africa for its components; they can be easily found in a flower shop. You will need to mix in equal proportions:
- turf land;
- sheet earth;
- peat;
- coarse sand.
A handful of charcoal will be a good addition to the composition: it absorbs excess moisture and prevents the development of pathogenic fungi. Heavy clay-containing earth is strictly prohibited. The water in it will stagnate, and the roots will lack oxygen. The result will be disastrous - Zamioculcas will die.
Be sure to decontaminate the soil. You can do this in the oven or in the freezer. High and low temperatures are equally detrimental to pests and pathogenic flora.
Choosing a pot is no less responsible task than preparing the soil. Zamioculcas is a rather large plant, and its root system can greatly increase in size. Plastic containers are suitable only for young plants. For adults, you need to choose stable ceramic pots. The presence of drainage holes is mandatory!
The pot must be high so that the drainage layer can occupy at least ¼ of the total volume. In shape, it is better to choose narrowed downward, but with a wide top, flowerpots, so that when transplanting it is more convenient to extract the plant. The size of the new tank should differ from the old one by several centimeters. Do not think that a pot too large is good. Only the underground part will develop in large volume, and the green mass will only have to patiently wait until the roots conquer space.

Pick up a pot for zamiokulkas high, with a wide top
When is it better to transplant
The best time for a transplant, of course, is spring. But if you missed a moment, then you can move the process to the beginning of summer. A slowly growing flower is rarely transplanted - once every 3-4 years, when the roots become crowded and the flower stops growing. Young plants need annual transshipment.
If you purchased zamioculcas in a store in the fall, then give it a couple of weeks for acclimatization, and then transplant it into a new container. This is done for 2 reasons:
- As a rule, in transport pots the plant is already crowded. This can be determined by the deformation of the plastic packaging.
- The soil in which zamioculcas is acquired is not suitable for the plant. It is based on a lot of peat, which retains moisture, and this plant is useless.
Autumn transplant will not cause any discomfort to Zamioculcus.
Step-by-step transplant instructions
- We fill the new flowerpot by a quarter of the volume with drainage. Top with a little prepared substrate.
- We begin to carefully remove the zamioculcas from the old pot. Sometimes it’s very difficult to do because of a very large root system. To facilitate the task, the plastic container can be washed by hand. Then put the pot on its side, hold it at the bottom with one hand, and try to grab all the leaves closer to the soil with the other and pull gently. If the process went easily - well, but if the plant sits tightly in a pot, then there is nothing left but to cut it.
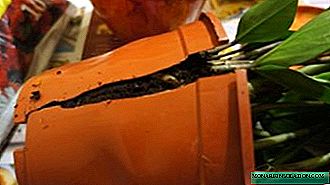
If the roots have grown too much, the pot is best cut
- The most suitable transplant method is transshipment.
Transplant Zamioculcas by transshipment
Thanks to this method, the roots remain intact and the plant quickly takes root.
- We put the extracted plant in the center in a new flowerpot and on the sides we fill up the remaining soil, slightly crushing it with our hands.
- Make sure that the roots do not go deep!


Zamioculcas transplant - video
If you transplanted into dry soil, you can water it a little, but be sure to drain the accumulated liquid in the pan. If the soil is moist, you can water it only for 2-3 days after transplanting.
A large specimen may first need support. It is best to use a collapsible circular to keep the spreading leaves.
Some nuances of transplantation
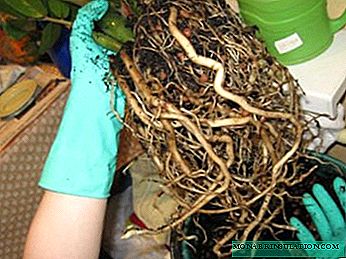
- If you decide to inspect the roots of the purchased Zamioculcas and free them from the transport soil, this can be done by soaking the roots in a basin of water. The peat substrate will get wet and easily come off the roots, then rinse the roots carefully in clean water.
- Carefully cut the detected affected areas with a sharp knife, and sprinkle the wounds with crushed activated carbon and allow the treated areas to dry for 24 hours. Do not water the planted plant for about a week. During this time, the roots should be restored, using the moisture that has accumulated in the tubers.
Table: possible problems associated with transplantation and their elimination
| Problem | Cause | Elimination |
| Zamioculcus leaves after transplant lost turgor | There can be three reasons:
|
|
| When transplanting broke branch | Zamioculcas have very juicy leaves, so you need to be careful when working with it. | It's okay, you can sprinkle a wound on a large plant with crushed coal. A broken branch can be rooted. |
| Zamioculcas after transplant is not growing | Pot too big. | Until the roots conquer the entire space, the leaves will not grow. When transplanting, you need to choose a capacity that is no more than 4 cm larger than the previous one. |

If during the transplant, the leaf of Zamioculcas breaks down, it does not matter, it can be rooted
As you already understood, a transplant is not as scary as it seems at first. The main thing is to choose the right soil, pot and do the work in stages. And in gratitude for the work done, Zamioculcas will certainly thank you with luxurious leaves, and possibly flowering.