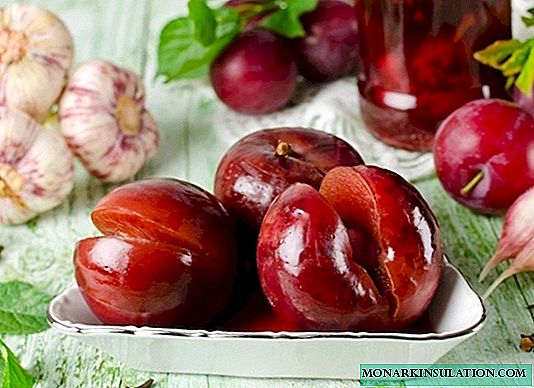
You will not surprise anyone with apricots in central Russia. Thanks to the efforts of breeders, varieties with very tasty fruits are now ripening here. You can plant an apricot tree in the country if the gardener has enough space and basic skills for caring for fruit trees.
Apricot planting dates in central Russia
In regions where the apricot feels like a host, both spring and autumn planting of the apricot are possible, if only there is no sap flow at this time, and the buds have not yet awakened. For example, in the Stavropol Territory or the Kuban, the optimal planting dates for apricots are from mid-October to mid-November. In the middle lane the situation is somewhat more complicated. Still, apricot trees are not as winter-hardy as, for example, an apple tree or a pear, traditionally cultivated almost throughout the country. Therefore, the autumn planting of apricot is quite risky: a poorly acclimated seedling in the winter can freeze and die.
The degree of winter hardiness of the apricot is somewhat increased by planting it on local varieties of cherry plum or plum, as well as on taiga trees like the Manchu apricot, but this only partially solves the problem.
If we are considering planting a finished seedling from a distribution network, and not the whole process of growing it from apricot kernel, the question of planting dates in the middle lane is practically not worth it: it should be carried out only in the spring, and rather early, before the buds wake up. And they start an active life at the apricot even earlier than at the apple tree, so the planting dates in the middle lane are very tight. In most areas, only one or two weeks remain, falling at the end of April, while the seedlings are still sleeping, and it is already possible to work with the land. You can try to plant apricot in the fall, approximately from mid-September, but then you don’t have to worry very much if the work turns out to be in vain.
If you managed to buy a reliable seedling in the fall (after all, it happens: in the fall there are less chances to run into confused varieties, sellers usually behave more honestly), it can be left until spring. You can even keep it in the cellar, but it’s better to dig it in the garden, burying it almost entirely in an inclined position in the ground and cover it well with brushwood or pine conifer. But all preparations for the spring planting must be carried out in the fall: in the spring, digging the planting pits and ripening the soil in them simply does not have enough time.
How to plant apricot in spring in the middle lane - step by step instructions
The climate of central Russia, and especially the Moscow region, is famous for winter surprises and the inability to predict how the upcoming winter will differ. And if severe frosts are not very scary for most modern apricot varieties, bred specifically for the local weather conditions, then frequent and unexpected thaws are the main trouble of apricot trees. The roots are warmed up and traumatized by ice crusts formed after thaws. Struggling with evaporation, the apricot is grafted onto a plum or turn at a certain distance from the roots, in the stem of the frost-resistant stock. A few decades ago in central Russia only apricots were considered available apricots. They grow quite resistant to weather conditions, but give small and not very tasty fruits. Now the situation is different.
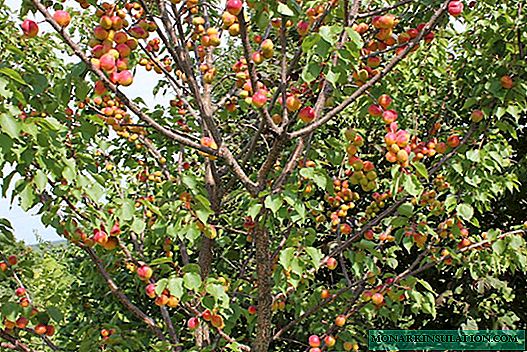
The best varieties of apricot are considered to be Northern Triumph, Lel, Krasnoshchekoy, Honey and Zeus. Eastern Sayan, which grows with a small tree (up to 3 meters tall), which greatly facilitates maintenance, is also popular in summer cottages.
In the XXI century, you can buy seedlings of most garden plants with a closed root system. True, you often need to buy together: a two-year-old tree is in a container with earth, no less than a bucket, and weighs a lot. They are easier to plant, and not necessarily in the spring. But we will consider the case of a usual planting, when all the roots are in front of us and we can easily make sure that they are powerful and healthy.
Choosing a landing place
Choosing a place in the country for planting an apricot tree, you must immediately clearly realize that it will grow with you for at least 25 years.
So, the first task is to choose a place on the site. Apricot tree negatively responds to heavy soils with a predominance of clay. Breathable loams appear to be the best. The reaction of the soil should be close to neutral. Most apricot varieties are very powerful trees that obscure the entire surrounding area. Apricot greatly depletes the soil for many meters around itself: its root system significantly extends beyond the crown projection. Therefore, almost nothing can be planted next to him, and this also must be taken into account. In addition, for successful pollination of flowers, it is desirable to plant at least two trees nearby, planting them at a distance of 3-4 meters from each other. A lonely apricot will also bear fruit, but the yield in this case is less. Next to it, you can plant only low early spring flowers (tulips, daffodils, crocuses). No need to plant apricot where other stone fruits have been uprooted recently (e.g. plum or cherry).
Apricot planted in central Russia should be lit as much as possible by sunlight. But even this is not the most important thing. It must be maximally protected from blowing through by piercing winds, especially from the north.
The most profitable place for apricot is usually located somewhere on the south side of the site, especially if there is wind protection in the form of a house or a blank fence.
If this is not the case, it is advisable to construct a screen specifically for the apricot. Often, summer residents install shields made of white paint from boards or metal so that more sunlight falls on the apricot tree and warms it faster. In any case, when landing, you must avoid any low places where cold air accumulates. In such places, water stagnation is often formed, which is even worse for an apricot than severe cold.

Any tall buildings protect apricot trees well from the harsh north winds.
In nature, apricots often grow on mountains, sometimes so steep that they keep the mountain slopes from shedding with their roots. The middle lane of our country is basically a plain, and for summer residents this is a plus: it is easier to care for a garden. Nevertheless, agrarian scientists are advised to remember the natural conditions of apricot life and plant it on artificial heights, and they must be built regardless of the type and composition of the soil on the site. The apricot mound should be up to half a meter high and up to 2-3 meters in diameter.
Landing pit requirements
What is a hill, how to make it? Its construction will still have to start with the preparation of the landing pit.
The second task: dig a landing pit. We do it the previous fall. This is what they always do when planting trees in the garden: to dig frozen and wet ground in early spring is not the greatest pleasure! A pit for apricot digs solid: dimensions not less than 70 cm in depth and diameter. Although not necessarily in diameter: in the projection it can be square: both simpler and swarm. The less fertile the land on the site, the deeper you need to dig. It is worth recalling that the upper, fertile layer of soil is stacked in one heap, and the lower, useless, in another, it is then removed from the site or scattered along the tracks.

On this, the good ground, apparently, ended: what goes further will have to be thrown away
The third task: drainage. Here options are possible, depending on the severity of the soil on the site. In the case of clay, drainage is mandatory: 10-15 centimeters of gravel, pebbles, broken bricks, etc. If the sand is mostly in the country, then it is exactly the opposite: it’s better to put some clay on the bottom of the pit, with a layer of up to 15 cm. It will help to keep apricot roots water when watering.

For clay soils, drainage in the planting pit is absolutely necessary
Instead of gravel, some gardeners place sheets of flat material at the bottom: slate or iron, creating an artificial obstacle for the roots to penetrate deeper. In such a pit, the roots will mainly grow in different directions, which will save them from the harmful effects of groundwater.
The fourth task: the preparation of a nutrient mixture. On top of the drainage, soil removed from the pit from the upper layers is poured. But even on earth, this soil must be thoroughly mixed with fertilizers. The main pre-planting fertilizer is organic: humus, compost, and semi-rotted manure. It needs a lot: you can bucket 6. Of the many available minerals, complex fertilizers are most convenient, so as not to collect potassium, phosphorus and nitrogen in parts.
Azofoska, which contains the main nutrients in a balanced ratio, has gained great popularity among gardeners.
Azofosku (synonym: nitroammophosk) should be evenly distributed in the excavated soil, taking about 500 g. If the soil on the site is strongly acidic, you will have to add half a bucket of slaked lime or chalk. But the most environmentally friendly fertilizer in the garden is wood ash. Ash is the most reliable supplier of potassium, which is especially loved by apricots, in addition, potassium is gradually released from it, so you can fill the planting hole with ash for future use by pouring half a bucket of ash from burning branches, boards and other wood waste.

Ash is one of the most important fertilizers for most garden crops
Seedlings preparation
Carefully inspect the seedling of any fruit tree should be even with the purchase. Needless to say, buying on roadsides from obscure sellers is not a promising business. Now in big cities it’s not a problem to find a reliable trading network, but in small cities such questions are usually solved by a chain: gardeners know each other well.
The fifth task: to choose a seedling. When acquiring an apricot seedling, the main attention should be paid not to the branches, but to the apparatus that feeds the tree: these are its roots. The main roots extending directly from the base of the stem should be at least three. All of them should be without excessive growths, resilient, bend well, and not break, not look overdried. If there are slightly damaged roots during excavation, they can be shortened with a sharp pruner to the beginning of the undamaged area, but at the same time, both thick main roots and fibrous small, main workers for absorbing moisture from the soil should remain.

When choosing a seedling, we look mainly not at the branches (cut them anyway), but at the roots
The most popular for planting in the middle lane are two-year-old seedlings: they will easily take root and will quickly yield the first fruits. But it happens that one-year-olds that are easy to recognize take root better: they only have a trunk without branches, and after planting you will have to shape the future tree yourself from scratch. The process is fascinating, but it takes longer to wait for the whole season than in the case of planting a two-year-old.
The sixth task: to prepare a seedling for planting. The roots of a seedling brought to the country house for spring planting should be placed for a couple of minutes in a talker made from fresh cow manure and clay (in a ratio of about 1: 2), shaken in water to the consistency of liquid sour cream. If there’s no talker, it’s not scary, but then you just need to put them in water, where they lie until the very landing, if possible get saturated with moisture.

Treated with a mixture of clay and mullein seedlings are easier to take root
Apricot planting technology in the middle lane
So, apricot in the middle lane of our country must be planted on a small hill, which is made at least 1.5-2 meters wide. But first we dug a hole and covered it with fertile soil! When planting, for example, an apple tree, we would take out part of the soil according to the size of the root system, put a seedling in the hole and fill the roots with earth. In the case of apricot, because of the construction of the knoll, one does not need to do this: maybe, on the contrary, it will still be necessary to add soil, it depends on the size of the seedling. But we must not forget about strengthening the seedling for the first couple of years.
The seventh task: installation of a support. First, you need to drive a strong stake into the pit (a metal pipe, a long reinforcement, a wooden stake from a once big female apple tree, etc.). It should hold firmly and protrude outward by almost a meter. A seedling should be placed next to the stake.

The stake in the pit must stand firmly and withstand at least a couple of years
The eighth task: installation of a sapling on the filled hole. In most cases, the seedling will have to be installed in the pit just at the ground level of the garden plot, and then the roots should be covered with soil. Of course, this work is easier to do together.

The seedling is placed next to the stake, and then form a mound
The ninth task: the construction of the mound. One of the participants in the planting should hold the seedling by the stem, placing it on a horizontal surface and spread the roots along it so that they take the most natural position. Another gardener will gradually spread clean, fertile soil on the roots. Constantly compacting the soil with your foot, you need to make sure that in the end a hill is formed. It is not necessary to put fertilizers, especially mineral ones, in this part of the soil so as not to burn young roots. Having started growth in a new place, they themselves will get to the fertilized soil, which we placed in the landing pit.

Even small hills help the roots cope with winter warming
As a result of the arrangement of the hill, after compaction of the poured soil, the root neck should be on top. It's okay if it is 2-3 centimeters above the top of the hill, but it is unacceptable for the root neck to remain underground: there will be much less harm if some roots are not completely covered with soil.
The tenth task: tying up a seedling. After arranging the knoll we take a strong ribbon without interference we tie the barrel to a pre-driven stake. All gardeners know how to do it right, and they call the style of tying "eight."

The G8 holds a sapling firmly, but it doesn’t interfere with growth
Task eleven: roller device. In the first years, a tree planted in a new place will need to be given a lot to drink until powerful roots grow in the right amount. Therefore, not far from the trunk, around the circumference of the mound, it is necessary to build a kind of roller so that the water does not run off the hill during irrigation. In autumn, this roller will have to be leveled so that during the winter thaws the water drains freely: excess water in winter is more harmful than a summer deficiency. In the spring it will be necessary to again fill the roller of the earth and do so the first few years.

Roller (side) for water retention will be required for several years
The twelfth task: watering a seedling. The first few buckets of water should be given to the seedling immediately after planting. Caution without washing out the top of the hill. In the first summer it is necessary to water systematically: the soil should not dry out for a single day. Periodically, the hill will have to be loosened so that a sufficient amount of oxygen arrives at the growing roots. In late summer, to prepare for wintering, it is better to water the apricot with infusion of wood ash. Adult apricots are rarely watered: in the summer, which is usual for conditions that are more harmful, they are able to produce powerful roots for themselves.
The hill can be covered with turf or sow grass on it: both lawn and aromatic herbs like lemon balm. The grass needs to be mowed periodically, while the apricot will have a natural mulch.
Task Thirteen: Trimming. A planted apricot tree should be lightly pruned immediately. The purpose of annual pruning is to form, ultimately, a powerful crown accessible to the sun. In the meantime, we need the first, shortening.Its task is for the roots that have not yet taken root for the first time to have the strength to feed the aboveground part of the seedling.
If you planted an annual twig without branches, you just need to shorten it by about a third. It is necessary to leave the trunk height not higher than a meter, and usually 60-80 centimeters.
If a two-year-old planted, that is, a tree that has already acquired side branches, then you need to cut the seedling more seriously. Having carefully examined the branches, we select the two most powerful, but located, if possible, opposite each other and at a slightly different height. Shorten your ear by half. The rest will have to be cut out completely, in a “ring” way. Do not forget to carefully cover all sections with garden varieties.

Apricot pruning is simple, the technique fits into the above diagram.
That's it. It remains to wait, but we got 13 steps, the number is unlucky. Step fourteen will be to wait for the first fruits to appear. Bon Appetit!
In the dacha gardens of central Russia, apricot planting is not quite the same as in the case of most other garden crops: it is planted on a specially created hill. It is necessary to carefully select a place on the site and plant a tree, observing all the rules. Then, with careful care, especially in the first summer, the apricot will grow in the form of a strong tree and will delight the owner with good crops.